Android App Development: 5 Steps to Success

Android applications are bringing a revolution in the everyday lives of humans. And, even though learning Android app development might seem like an intimidating job, you can get a new perspective and open doors to new opportunities.
So, if you are interested in gaining a new skill or planning to create an app for your organization, you can read along. Here, we have discussed the processes of How to Develop Android app in 5 steps.
We can’t assure that the procedure is undemanding. However, if you are a tech-savvy person, it won’t be an issue for you to get a grip.
Without much ado, let’s get into Android app development.
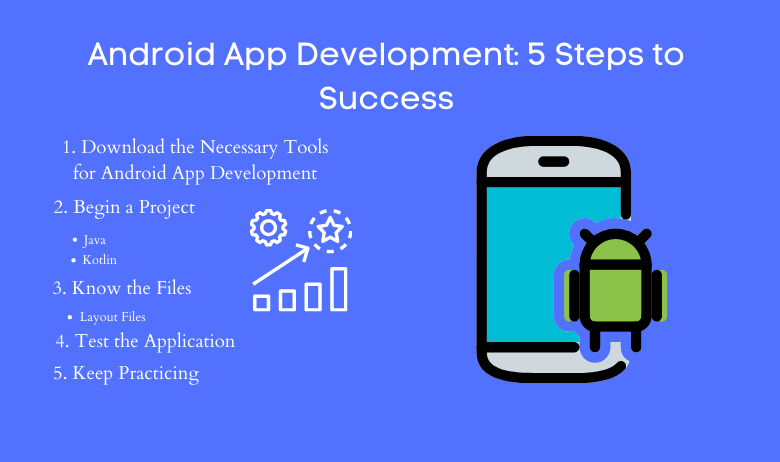
1. Download the Necessary Tools for Android App Development
The first step for any task is preparing the tools. And, as we talk about Android app development, there is no divergence. Therefore, you need to begin your task by downloading the necessary tools.
At first, you need to check and reassure the compatibility of the tools with the PC you use. You need to begin by downloading Android Studio and Android SDK. You can get these two in a package as well.
Now, Android Studio is an integrated development environment. The sole task of this tool is enabling you the power to enter code opt for vital tools. This app further brings a library to you along with APIs from Android SDK. As a result, it allows you access to native features of the OS.
In this regard, another useful tool for Android app development is Gradle using APK. Additionally, there’s another option that you can try. It is Unity. Especially if you are planning for cross-platform game development, Unity is the perfect tool.
You can go for Visual Studio and combine it with Xamarin as well. Irrespective of which tool you go for, you can complete the set-up using an on-screen guide only. So, pick your tool, and let’s continue with Android app development.
2. Begin a Project
Once you are done downloading and installing the tool, the required environment will be appropriate. And, it indicates that you are now free to begin a project. The steps can be a little different depending on the tool.
So, here, we will elaborate on the steps for Android Studio.
The process is not much complicated. However, you’ll have to make a few decisions during the procedure. And, what you decide will affect the app you create. So, take sufficient time to think and make a clear decision.
The development begins with navigating to File and then selecting New. Then, find the option that says New Project and click on it. Here, you need to choose a Project Template. And this template will decide the UI of your app.
In this regard, here, you will notice the word Activity. In the case of Android app development, the term Activity has a different meaning. It indicates a screen. So, if you see no activity that means the app screen is going to be empty. On the other hand, Basic Activity means the app will have a starting screen and a hamburger menu.
The whole concept of Activity can be a little hard to grip at first. So, you can look into the details and go for options that won’t require a lot of coding.
The next task will be choosing a name along with a package name. Accordingly, the name refers to what your users will see whereas the package name refers to internal reference that will differentiate your app from others.
Package name usually contains the domain name along with the app name. For example – com. android app. sample. The next decision you need to make is whether you want to write the code in Java or Kotlin. Also, this will decide where the files will be stored.
Here, we have listed the benefits of each.
Java
- Officially supported by Google as well as Android Studio
- Vastly used among professionals
- Supported by Google the longest
- Among the in-demand programming languages
- Has lots of prospects for the developer
Kotlin
- The top pick of Google at present
- It comes as default while developing an app
- Comparatively easier to learn
- Has potential to become the most popular one
Once you make your mind whether you want to go with Java or Kotlin, choose the minimum SDK. The lower you are ready to go for, the bigger your user base will be.
3. Know the Files
Familiarizing yourself with the files is an important task you will have to do as a developer. The process might seem overwhelming at times. However, as you move forward, you will find it easier.
We will begin with the main logic file. You will find it as MainActivity.java or MainActivity.kt depending on the programming language you pick. Follow the path My Application > App > SRC > Main > Java > com > Companyname > Myapplictaon to access the main logic file.
Now, as you move forward, you need to remember that the folders you use are vital here. Depending on the folders, Andoird Studio or whichever tool you are using is going to find the codes and execute them properly.
Therefore, do not rename the folders. Now, there will be some boilerplate code. These are the ones that you will find on the main page. You can use these to replicate other app projects or features.
Layout Files
Another important part of Android app development is layout files. The layout files will be different depending on the programming language. However, the functionality will be pretty much the same.
In order to find the layout files, follow this path: My application > App > SRC > RES > Layout. Remember that you can’t use capital letters for the files that you will store in the Resources folder. So, you can use the Underscore symbol.
There are some other important files and folders that will be there too. You will see the Android Manifest file which is responsible for defining the app’s important features. There will further be a folder called Drawable which you can find in RES. Use this for keeping future references.
Then, there is a folder called Values that stores the values as you launch your application. And finally, there will be Gradle. This one basically converts all the files into a workable APK. This will be vital while testing the app.
4. Test the Application
As you learn a new programming language, you need to develop an app that will say “Hello World”. This is quite an easy task and upon looking at the XML, you’ll find the aforementioned label.
Now, coming to the controls, you’ll find a green play arrow located at the top. And, the left side will have a drop-down menu. In this blog, you already have an Android emulator that came along with Android Studio. So, simply click on the green arrow to run a test. And, you’ll get to see how your app looks on an Android phone.
In case you feel the need of changing any settings like Screen size, space, and such. For that, navigate to Tools and then AVD Manger. You can run the test by plugging in any Android device as well.
Once you are happy with the interface, it’s time to launch the app. And, with that, we are at the last step of Android app development.
5. Keep Practicing
The best way of mastering anything is through practice. And, you need to do that same for Android app development as well. So, once you have successfully created an app, you have learned the basics.
Now, you need to keep editing the codes and keep learning new things. Only practice will make you better.
What you can do is learn simple codes and use them to edit the app you just created. Mastering Android app development will take time. Also, you need to remember that you can’t learn everything at a go.
So, select a particular thing you are willing to learn and work on it. Focus on features one at a time.
Ending Note
Android app development has lots of prospects. The importance of mobile apps is ever-increasing. So, learning about app development can help you make a shining career. So, give it a try. If you need professional assistance, you can contact 4 Way Technologies


